Foundry & industrial processing Machinery EQUIPMENT & SYSTEMS
U.S. & Canada Call 1.800.457.5456
How to Properly Clean & Maintain Mixing Chambers
Home Articles How to Properly Clean & Maintain Mixing Chambers
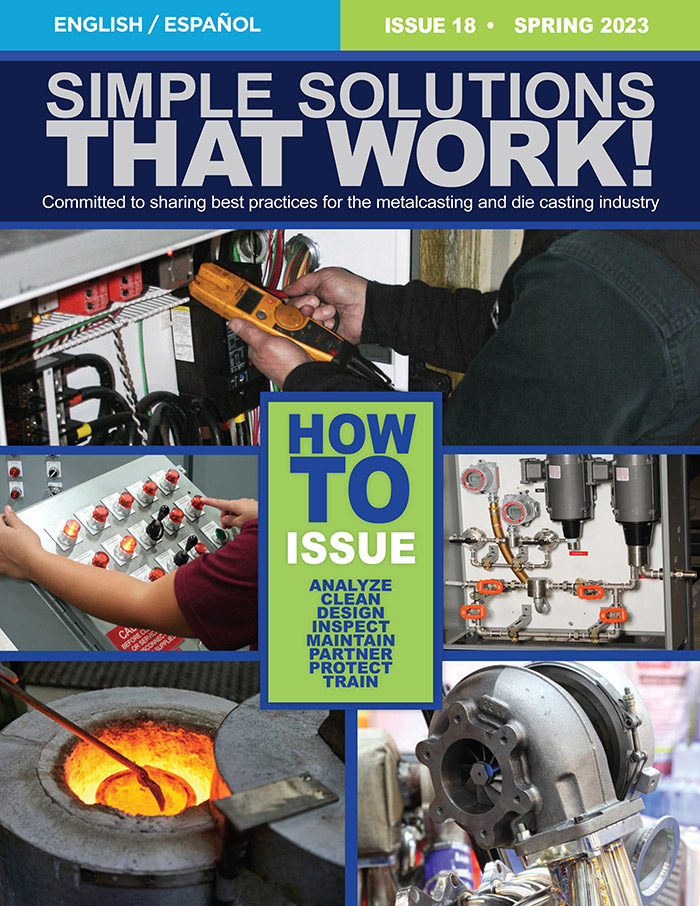
Simple Solutions That Work!™, Volume 18, April. 2023
Written - Jack Palmer
Jack Palmer
President
Palmer Manufacturing & Supply, Inc.
ARTICLE TAKEAWAYS:
There is tremendous amount of excitement when a new mixer is installed. Operators are formally trained on its operation, cleaning, and maintenance.
The manual is detailed and serves as a reference guide for many years. However, while mixers can serve a foundry for decades, finding the manual in good shape after a seasoned operator has retired is often difficult. We hope this guide will provide the reference material you need to properly maintain your mixing chambers.
CLEANING
It is essential to keep the discharge chute clean enough to allow the full flow of sand to exit without backing up into the mixer. The sand will buildup on the walls of this chute but the amount of running time before it requires cleaning is variable. The faster the sand is designed to set up, the faster it will build up on the walls of the discharge chute. It is not uncommon for the chute to require cleaning 4 times per shift 2-hour, 4-hour, 6-hour, and end of 8-hour shift.
It is necessary to stop the mixer and allow the shaft to come to a complete stop before attempting to clean the discharge chute. If it is the practice of the foundry to take breaks around the times suggested above, then it is most efficient if the mixer operator shuts down the mixer and begins his break period ahead of the rest of the line. Boxes can be stripped before the sand gets too hard. Then the operator comes back to the line first. The mixer shaft should have stopped turning by that time and the discharge chute can be cleaned. (Look at the motor fan to be sure it has stopped turning.) The mixer should be locked out before proceeding. A long chisel in a pneumatic chisel hammer works well. It is necessary to clean all the way up to the chamber minimizing the restrictions to flow.
Some foundries find it advantageous to apply a release agent to the walls of the discharge chute to make it easier to remove the buildup from the walls. It is necessary for the walls to be clean on the first application of release agents. The filler type aluminized coatings can be rubbed in with a cloth on a stick or rod. This will not prevent buildup but it will make it much easier to remove.
Generally, it is necessary to clean the blades on a continuous mixer at the end of each shift. Again, it depends on the amount of running time and the setup speed. Faster setting sands buildup faster.
The relationship between the end of the mixing blade and the inside diameter of the mixing tube is a key factor in the efficiency of the mix. DO NOT remove the sand lining of the mixing chamber during the normal daily cleaning operation.
- Shut-off main power to the mixer, lock-out, and keep the key in the possession of the person doing the cleaning.
- Release the clamp(s) and open the mixing chamber door. Be careful to stay away from the door clamping posts as the mixer opens. Never place your hand on the middle edge of one opened door while opening the other in two door mixers. The hand can get pinched between the two doors.
- Remove the major buildup from the mixing blades and drive shaft. It is not necessary to make these pieces “clean as new.”
- Care should be taken that no direct impact occurs to the tungsten carbide insert on the mixing blade. Tungsten carbide has a very high resistance to abrasion, but a very low impact resistance. A needle-type descaling gun will minimize the chances of damaging the carbide tips but it will take longer to clean. Operator/cleaners should report damaged blades so they can be replaced if necessary. The blades do overlap some so a small chip out of a corner is not a concern. If enough carbide is missing from a blade, there will be a ridge built up on the wall of the mixing chamber. Since sand travels along the periphery of the chamber, it will be forced inward at these ridges and may cause the mixer to plug.
- Observe the sand inlet throat to the mixer. There should not be any buildup on these walls. Buildup on these walls will eventually restrict the flow of sand into the mixer. The first sign of this will be excess dry sand at the end of the cycle until this reserve is cleared out.
- Before closing the mixing chamber door, be sure to clean all door mating surfaces to allow the door to return to its original position. Sometimes it is necessary to blow off the loose sand on the door and in the joint. Again, these surfaces can be coated with a release agent to facilitate easier clean up later.
- Close the doors and tighten the clamp so that the limit switch(es) are closed.
- It generally it is not necessary to clean the chemical ports at the end of every shift if the air jets are properly set. However, it is a good idea for the ports to be checked prior to calibration. This is a convenient time to do this since the nozzles will be removed anyway. The mixer shaft must not be rotating when any rod is inserted into the chemical inlets.
PREVENTIVE MAINTENANCE
- Grease both front and rear drive shaft bearings once every 200 running hours. One shot is sufficient. DO NOT OVER-LUBRICATE the bearings! Overlubrication will shorten bearing life faster than no lubrication at all.
- Once per week, with the mixer locked out, open the chamber doors and place a pry bar under the shaft near each end and pry up. There should be no movement
- Mixer shafts equipped with threaded blades should be checked for proper angle and jam nuts should be tight.
Note: Shafts designed to use pinned blades are available. This eliminates the possibility of blade orientation changing - Check to see that no chemicals are accumulating in the chamber near the ports. If raw chemical is present, determine why this is occurring – pump delay time, sluggish valve activation, or leakage through valves.
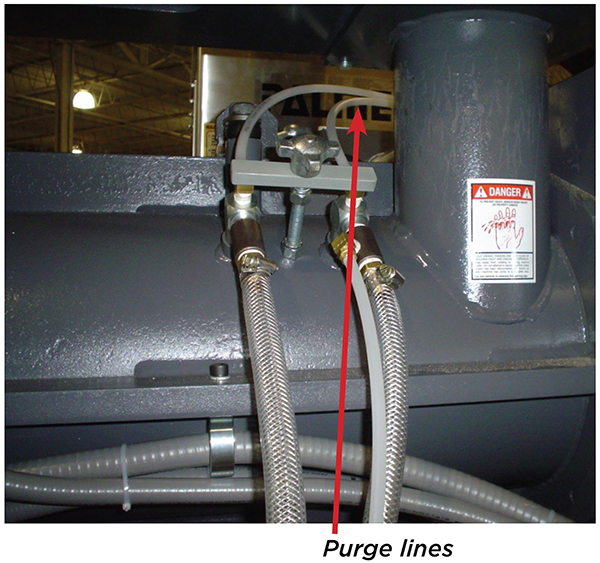
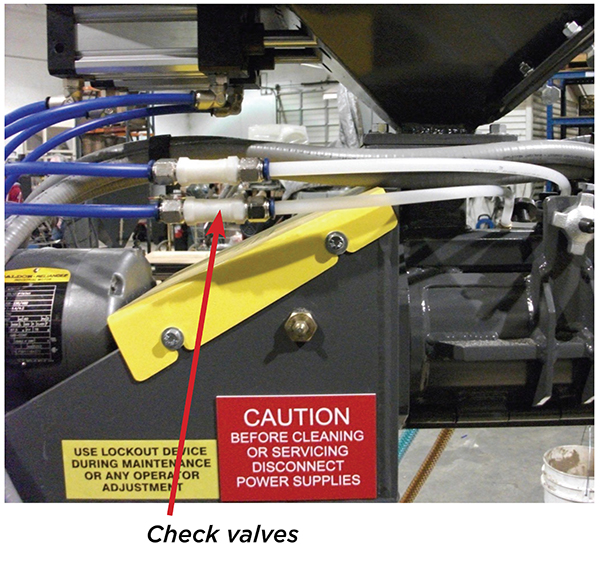
- Check purge air lines that no resin has backed up into them. If there is evidence that chemical has backed up into the purge air lines, check/replace check valves. Inoperative check valves can permit resin to reach the solenoid valve bank and damage/destroy the valves.
The recommended routing of the purge airlines has changed since some mixers were sold. Below is the recommended routing. This routing reduces the chances of resin reaching the check valves.
Palmer Manufacturing & Supply, Inc.
18 Bechtle Avenue Springfield, Ohio 45504
US/Canada: 800.457.5456
Phone: 937.323.6339
Fax: 937.323.2709
Sales E-mail: [email protected]
Palmer companies
Palmer Manufacturing & Supply, Inc.
Palmer Engineered Products, Inc.
Klein Palmer, Inc.


Copyright © 2024 Palmer Manufacturing & Supply, Inc. | Terms and Conditions | Privacy Policy
Web published by Marketing Options, LLC.